

Transform Your Data
Create an SQL transformation that joins your loaded tables into one denormalized table, and learn how input and output mapping keep Storage safe.
Four raw tables are not much use on their own. This step joins them into one wide table with SQL, and introduces the mechanism that keeps your source data safe while you do it. Step 3 of the Getting Started arc.
What you need
Section titled “What you need”Four tables in Storage — opportunity, account, user and level — from
Load Your Data. They sit in whatever bucket the connector created,
and its name contains a configuration ID, so yours will not match the screenshots.
That does not matter. What the SQL depends on is the Table name you give each table in the
input mapping below: those must be exactly opportunity, account, user and level, or you
have to edit the queries to match.
How a transformation works
Section titled “How a transformation works”A transformation never runs against your Storage tables directly. Keboola copies the tables you ask for into a temporary database schema, runs your queries there, and copies back only the results you ask for. Three settings control that:
- Input mapping — which Storage tables get copied in, and what they are called inside the transformation. Anything you do not list is not visible to your code.
- Output mapping — which tables your code produces get written back to Storage, and where. Anything you do not list is thrown away when the job ends.
- Queries — the SQL itself, organized into named code blocks.
That is the safeguard: the only tables your transformation can change are the ones named in the output mapping. It is also what lets Keboola track data lineage across the project.
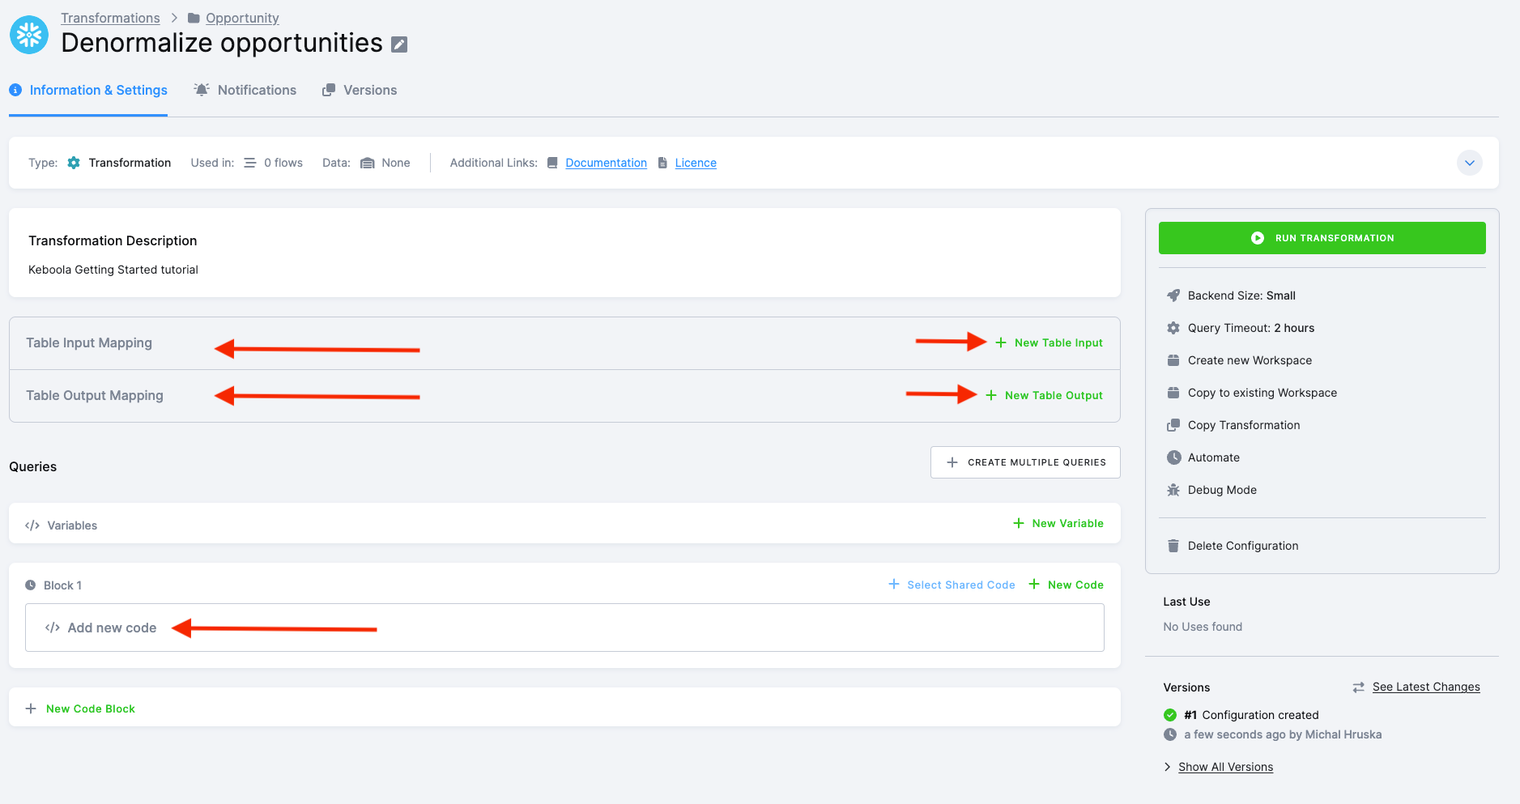
Create the transformation
Section titled “Create the transformation”-
Open Transformations.
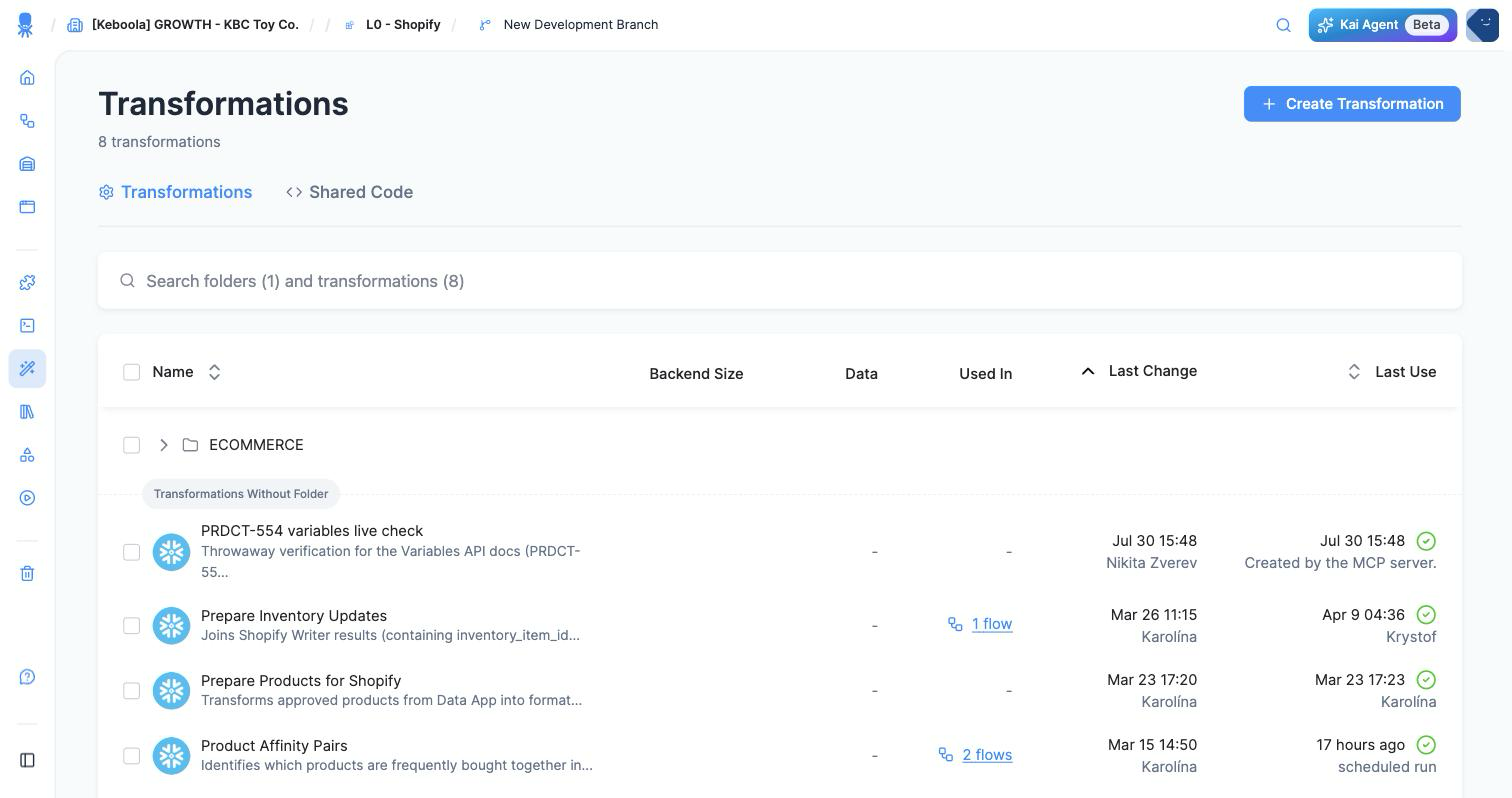
-
Click Create Transformation. The New Transformation dialog lists what this project can run — Snowflake SQL Transformation, Python, R, and DuckDB Transformation (beta). On a BigQuery project the SQL entry is the Google BigQuery one instead.
This list is how you find out which SQL dialect you need. New Free Plan projects default to the BigQuery backend; contract customers choose theirs. Pick the SQL transformation your project offers, and use the matching query block below.
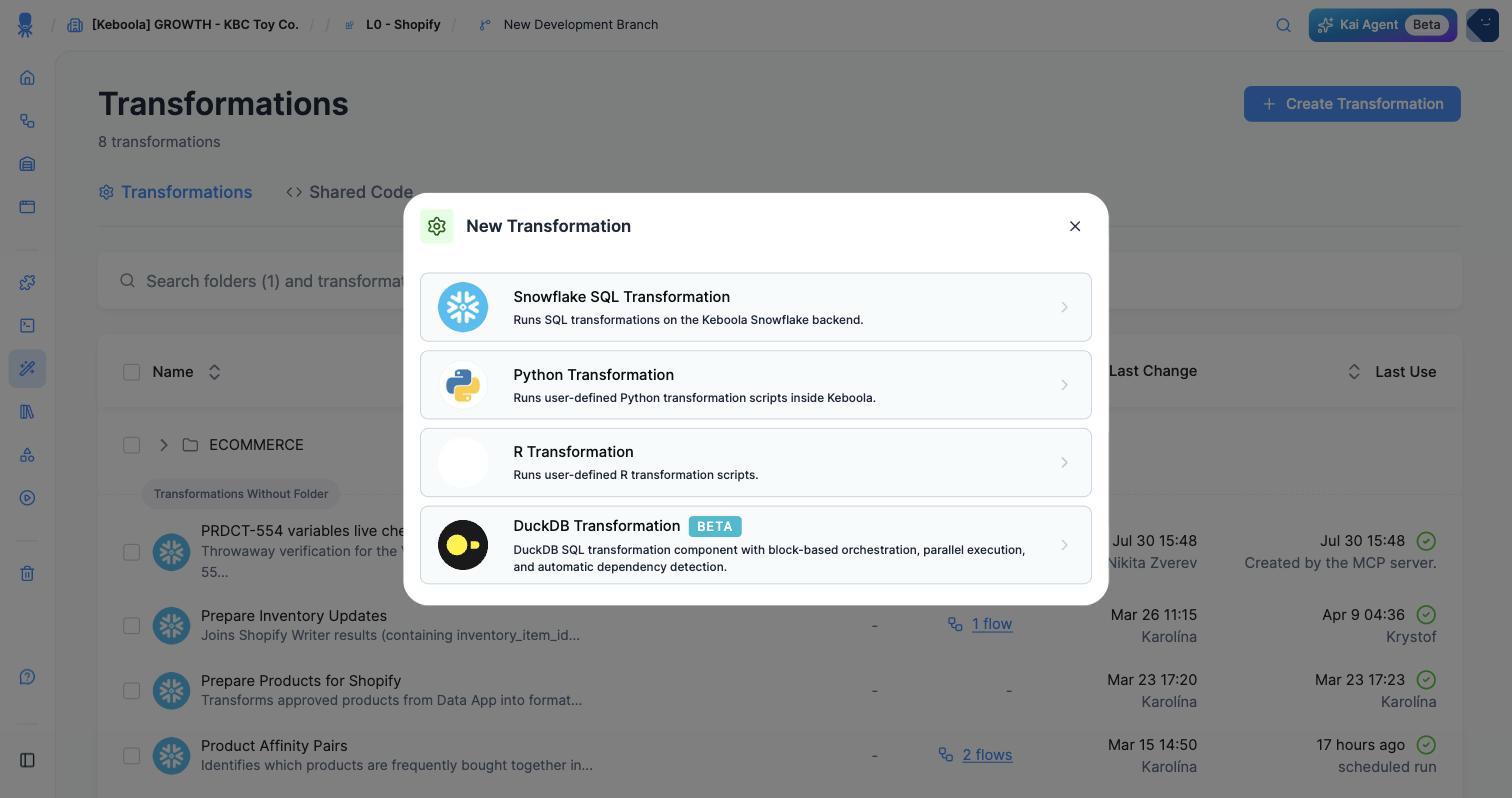
-
Name it
Denormalize opportunities, add a description, and in Folder typeOpportunityand pick Create folder “Opportunity”. Folders are cosmetic, but they are the difference between a browsable project and a wall of configurations. Ignore Use predefined code pattern. Click Create transformation.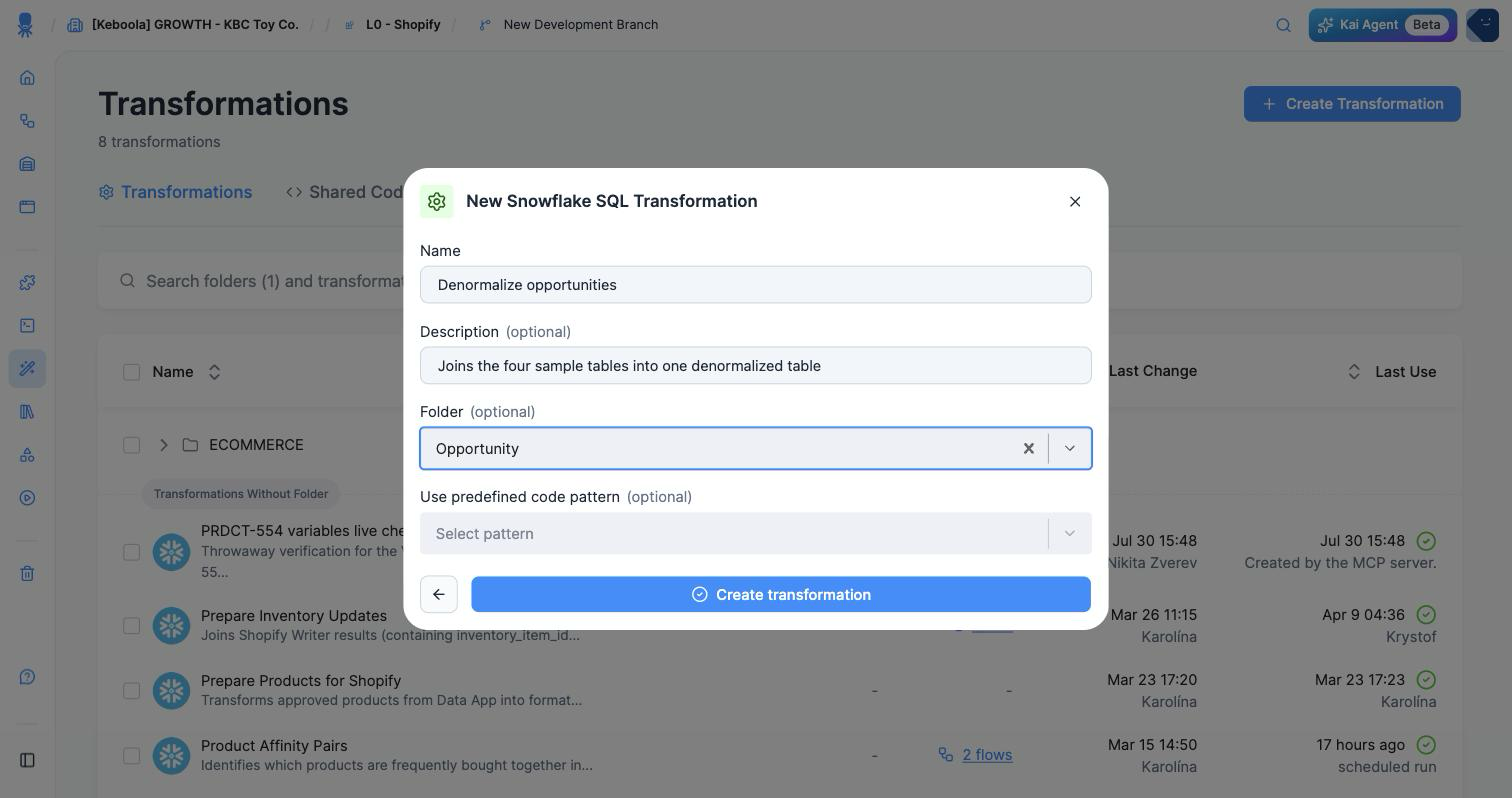
Set the input mapping
Section titled “Set the input mapping”-
In Table Input Mapping, click Add Table Input.
-
Source searches your Storage as you type. Type
opportunityand tick the table; the picker is multi-select, so tickaccount,userandleveltoo — it keeps a count of what you have chosen.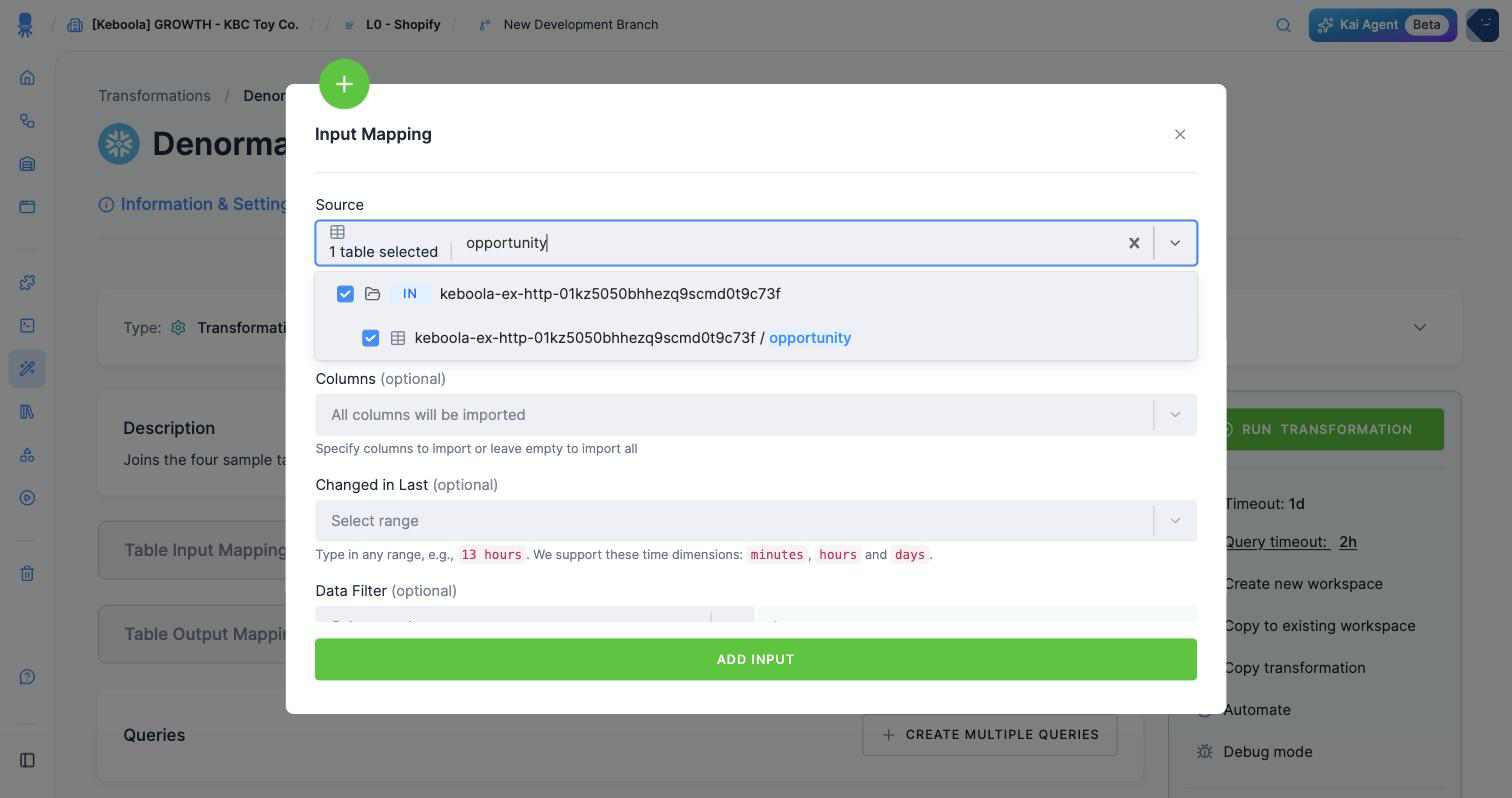
-
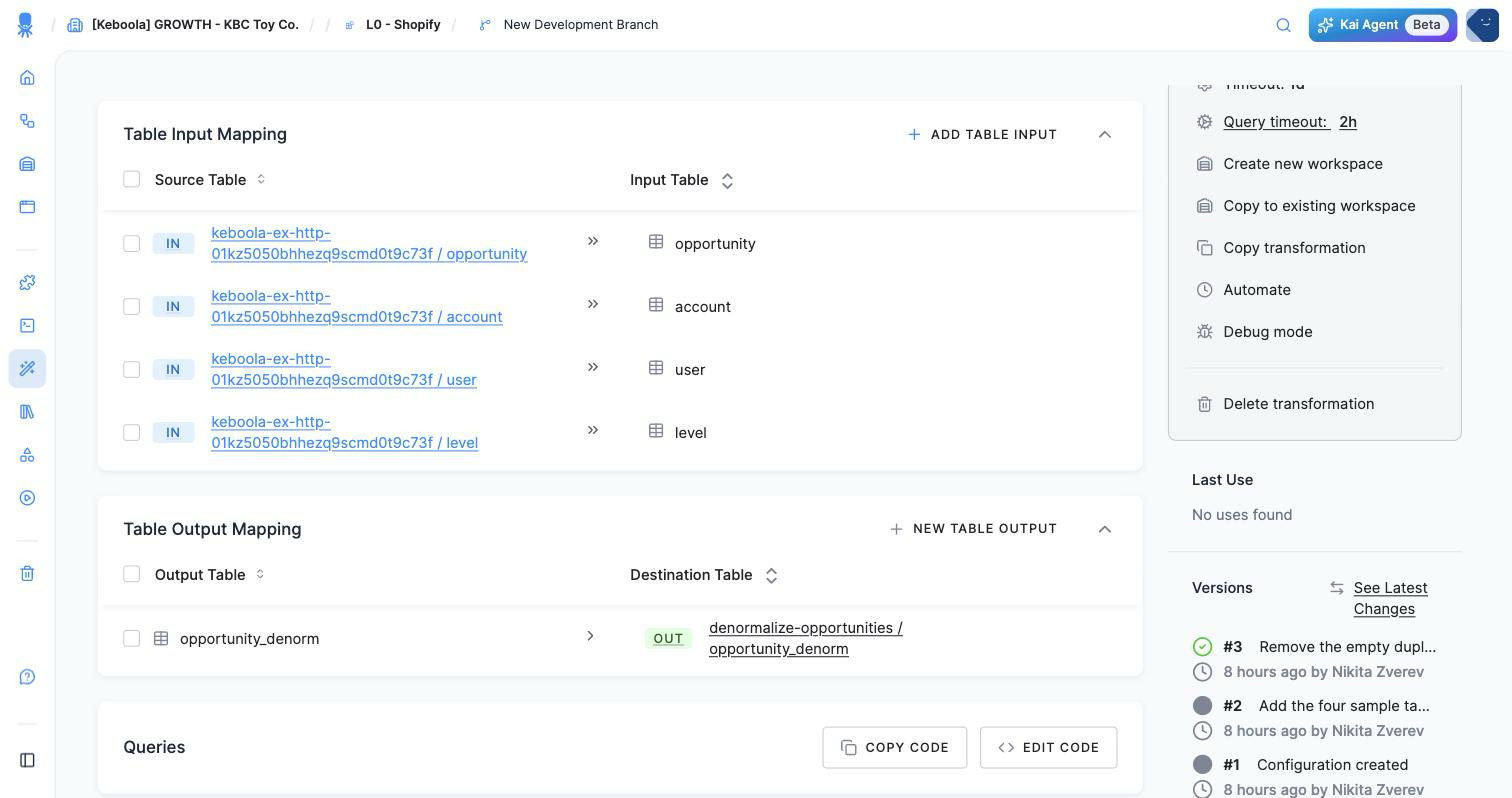
Click Add Input. Each table arrives with its Input Table name taken from the source table —
opportunity,account,user,level.Those four names are what your SQL uses, which is why the queries below work no matter which bucket the tables actually live in. If you add a table on its own rather than in a batch, the dialog exposes the same value as a Table name field you can edit.
You should end up with four inputs, listed as Source Table → Input Table:
Input mapping has more to it — incremental processing with Changed in Last, column filters, data filters. None of it is needed here; see input mapping when you have a large table to process.
Set the output mapping
Section titled “Set the output mapping”-
In Table Output Mapping, click New Table Output.
-
In Table name, enter
opportunity_denorm. This is the name of a table your SQL will create — it does not exist yet. -
Destination is filled in for you from the transformation’s name:
out.c-denormalize-opportunities.opportunity_denorm— theoutstage, a bucket named after the transformation (note the plural), and the table. Neither the bucket nor the table exists yet; both are created the first time the transformation runs.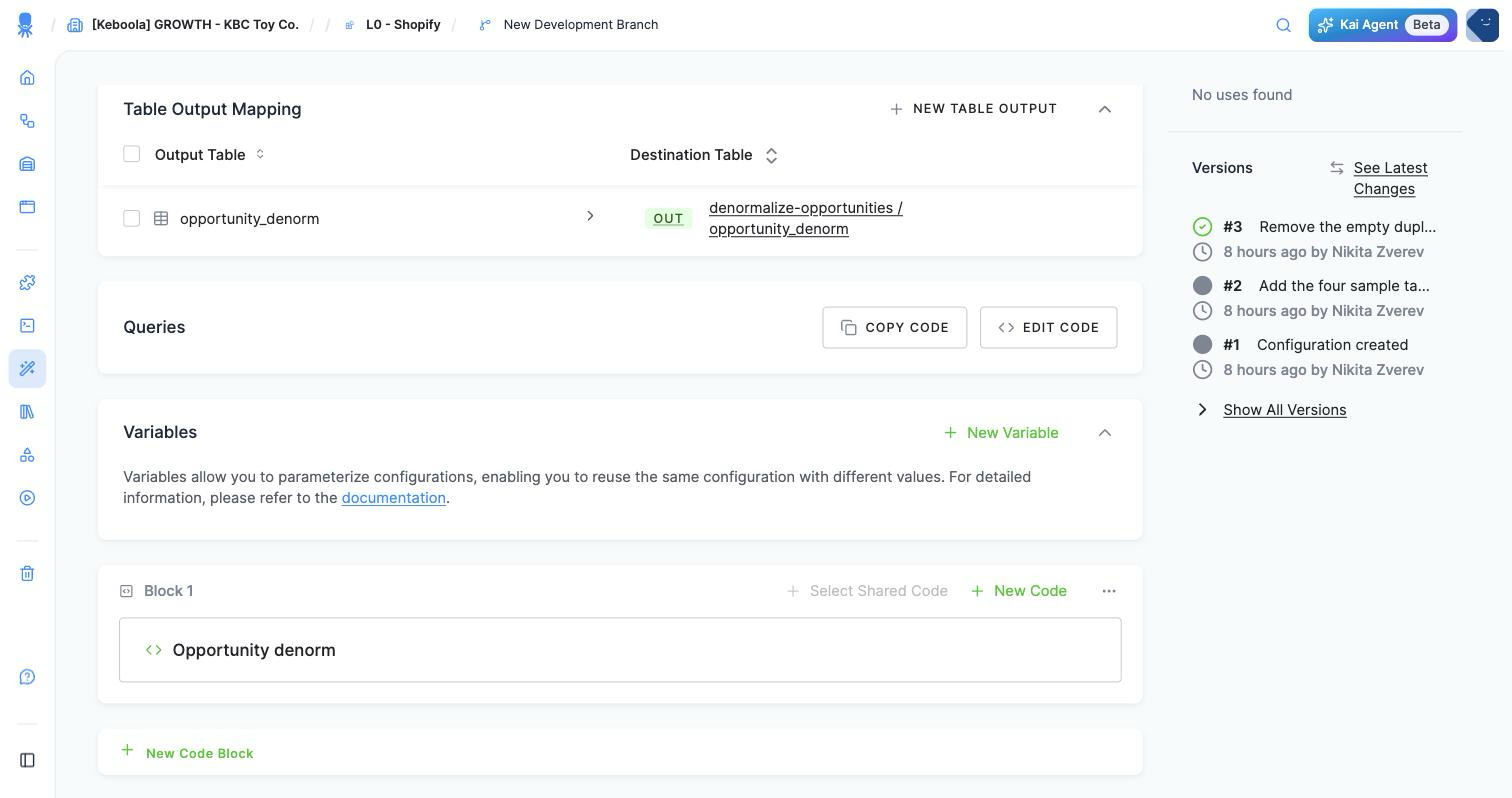
Write the queries
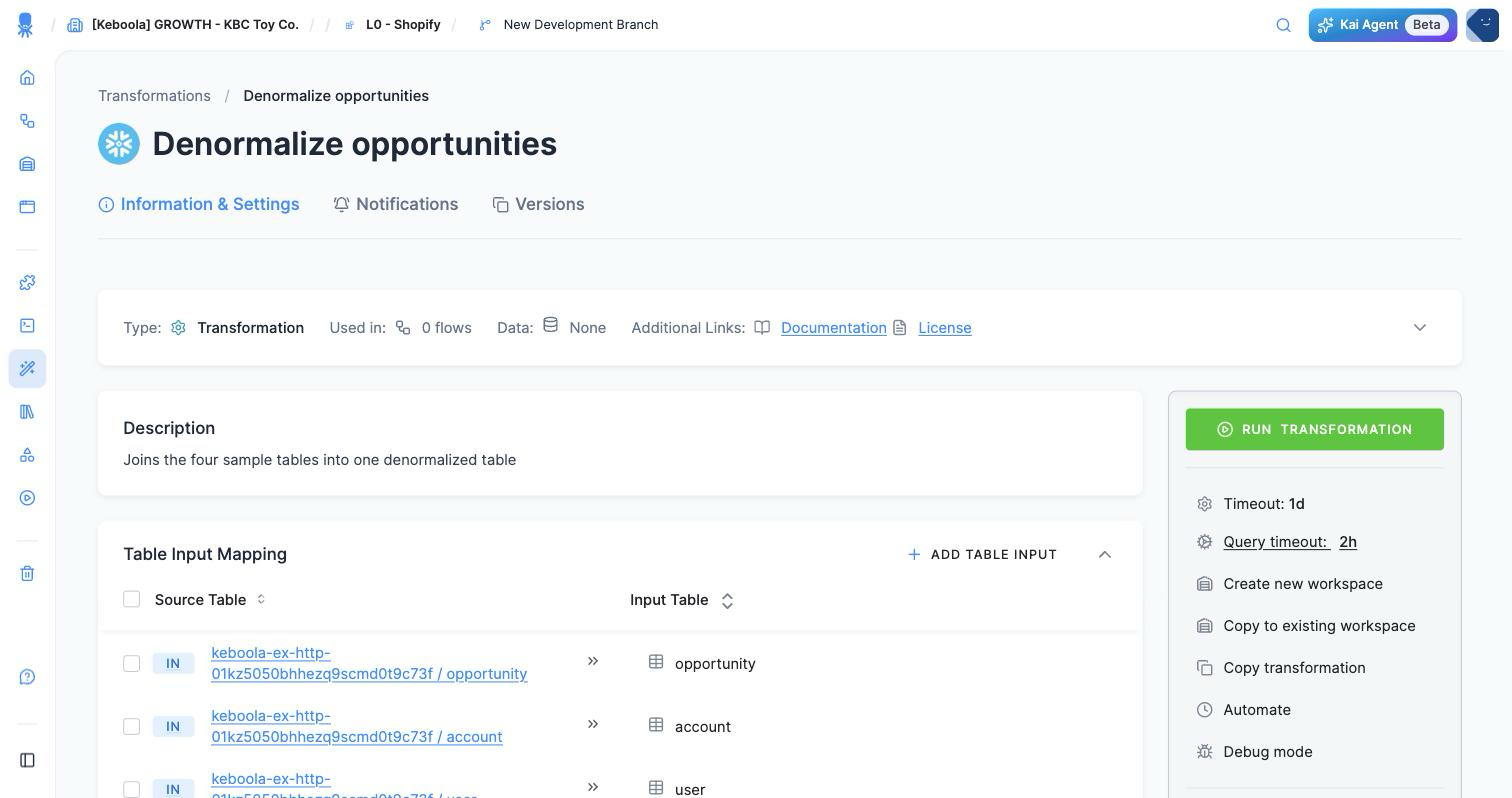
Section titled “Write the queries”In the empty Queries section, click Create Multiple Queries. Your SQL lives in a code
inside a block: you get Block 1 holding one code. Name the code Opportunity denorm, paste
the SQL for your project’s backend, and save.
Later you can add another code to the same block with New Code, or a whole second block with New Code Block — that is how a longer transformation gets organized. Once there is code, the Queries header offers Copy Code and Edit Code.
If your project uses Snowflake
Section titled “If your project uses Snowflake”CREATE TABLE "tmp_level" AS SELECT "Name", CASE WHEN "Level" = 'S' THEN 'Senior' WHEN "Level" = 'M' THEN 'Intermediate' WHEN "Level" = 'J' THEN 'Junior' END AS "Level" FROM "level";
CREATE TABLE "tmp_opportunity" AS SELECT *, CASE WHEN "Probability" < 50 THEN 'Poor' WHEN "Probability" < 70 THEN 'Good' ELSE 'Excellent' END AS "ProbabilityClass" FROM "opportunity";
CREATE TABLE "opportunity_denorm" AS SELECT "tmp_opportunity".*, "user"."Name" AS "UserName", "user"."Sales_Market" AS "UserSalesMarket", "user"."Global_Market" AS "UserGlobalMarket", "account"."Name" AS "AccountName", "account"."Region" AS "AccountRegion", "account"."Status" AS "AccountStatus", "account"."FirstOrder" AS "AccountFirstOrder" FROM "tmp_opportunity" JOIN "user" ON "tmp_opportunity"."OwnerId" = "user"."Id" JOIN "account" ON "tmp_opportunity"."AccountId" = "account"."Id" JOIN "tmp_level" ON "user"."Name" = "tmp_level"."Name";Three queries, in order: spell out the seniority codes; classify each opportunity by how
likely it is to close; then join everything into opportunity_denorm. Only that last table
is in the output mapping, so the two tmp_ tables vanish when the job finishes.
Every identifier is double-quoted because Snowflake uppercases unquoted ones, and the column names in the sample data are mixed case.
If your project uses BigQuery
Section titled “If your project uses BigQuery”BigQuery does not quote identifiers this way, and CTEs replace the temporary tables. It is written to produce the same table:
CREATE TABLE opportunity_denorm ASWITH tmp_level AS ( SELECT Name, CASE WHEN Level = 'S' THEN 'Senior' WHEN Level = 'M' THEN 'Intermediate' WHEN Level = 'J' THEN 'Junior' END AS Level FROM level),tmp_opportunity AS ( SELECT * EXCEPT (_timestamp), CASE WHEN CAST(Probability as INT64) < 50 THEN 'Poor' WHEN CAST(Probability as INT64) < 70 THEN 'Good' ELSE 'Excellent' END AS ProbabilityClass FROM opportunity)SELECT tmp_opportunity.*, user.Name AS UserName, user.Sales_Market AS UserSalesMarket, user.Global_Market AS UserGlobalMarket, account.Name AS AccountName, account.Region AS AccountRegion, account.Status AS AccountStatus, account.FirstOrder AS AccountFirstOrderFROM tmp_opportunityJOIN user ON tmp_opportunity.OwnerId = user.IdJOIN account ON tmp_opportunity.AccountId = account.IdJOIN tmp_level ON user.Name = tmp_level.Name;Run it and check the result
Section titled “Run it and check the result”Click Run Transformation and confirm with Run. That creates a background job which copies
the input tables in, runs your SQL, and writes opportunity_denorm back to Storage. On the Snowflake run behind these
screenshots the job log spelled the mechanism out — “Loading 4 tables to workspace”, then
“Cloned table … into workspace WORKSPACE_… as opportunity” — which is the mapping model from the
top of this page, in action.
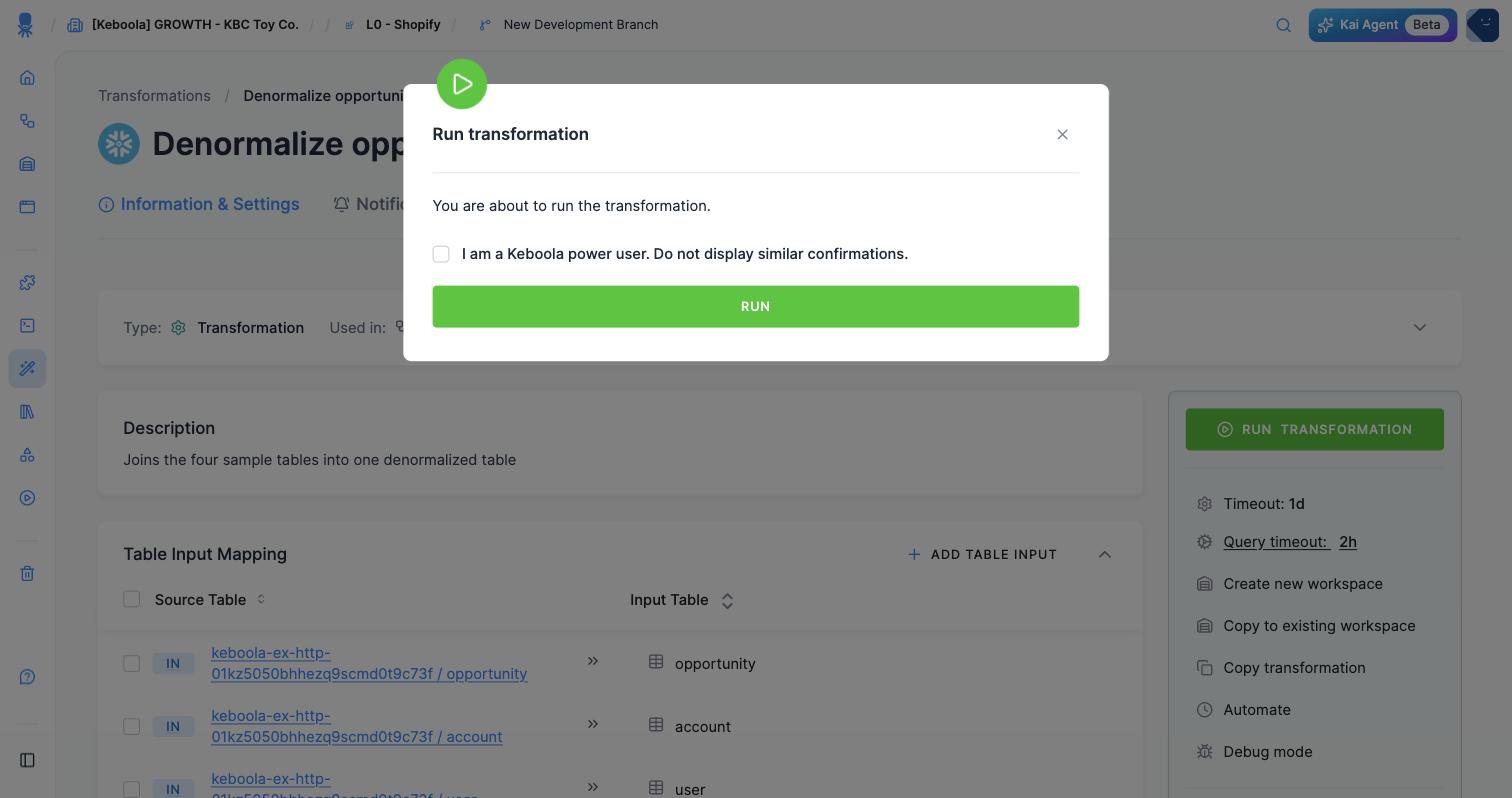
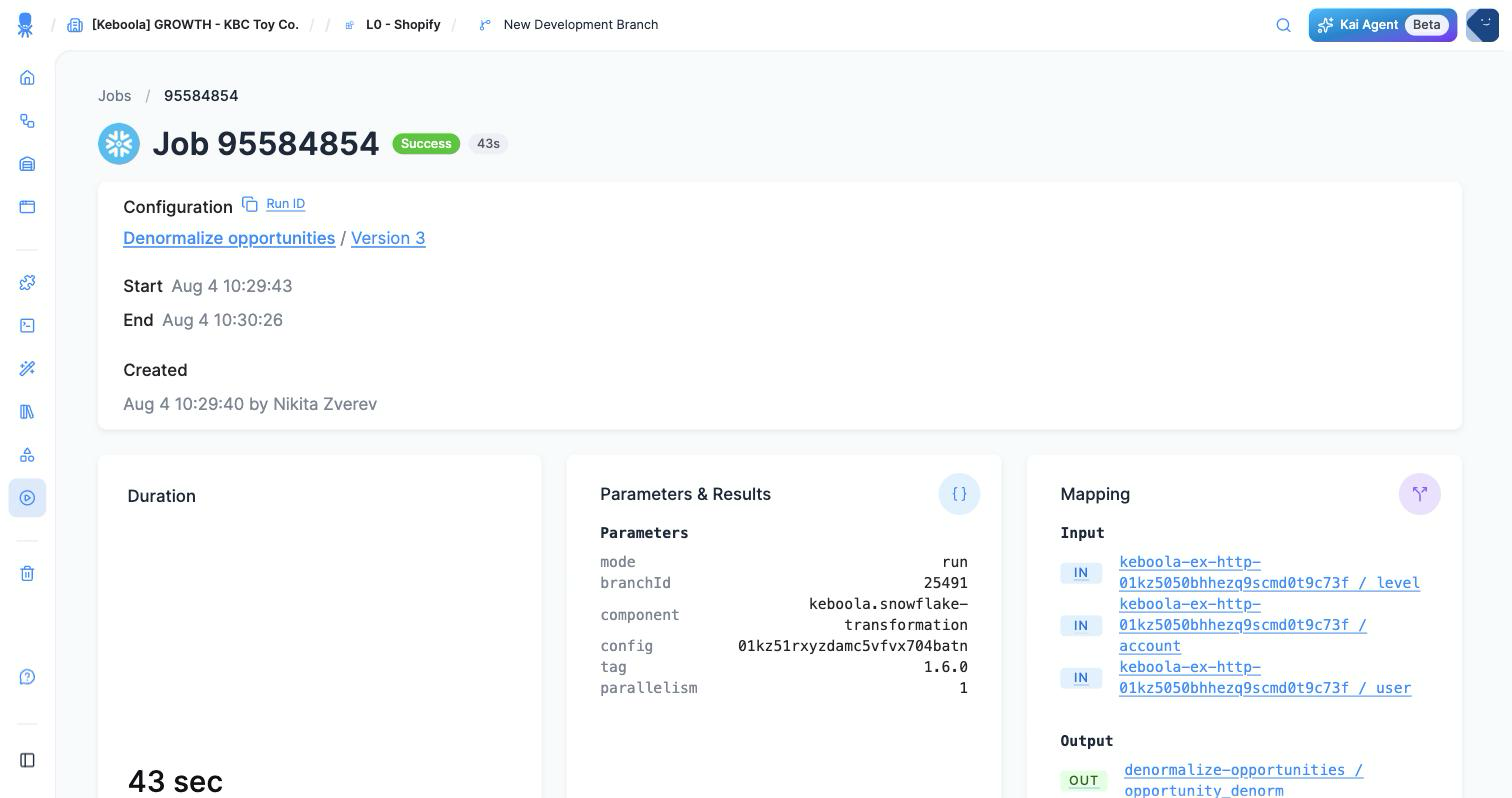
A notification appears with a Show job link — Snowflake SQL job has been scheduled, or your backend’s equivalent — and you can also find it under Jobs. It takes under a minute — the run behind these screenshots took 53 seconds — and a green Success means it worked.
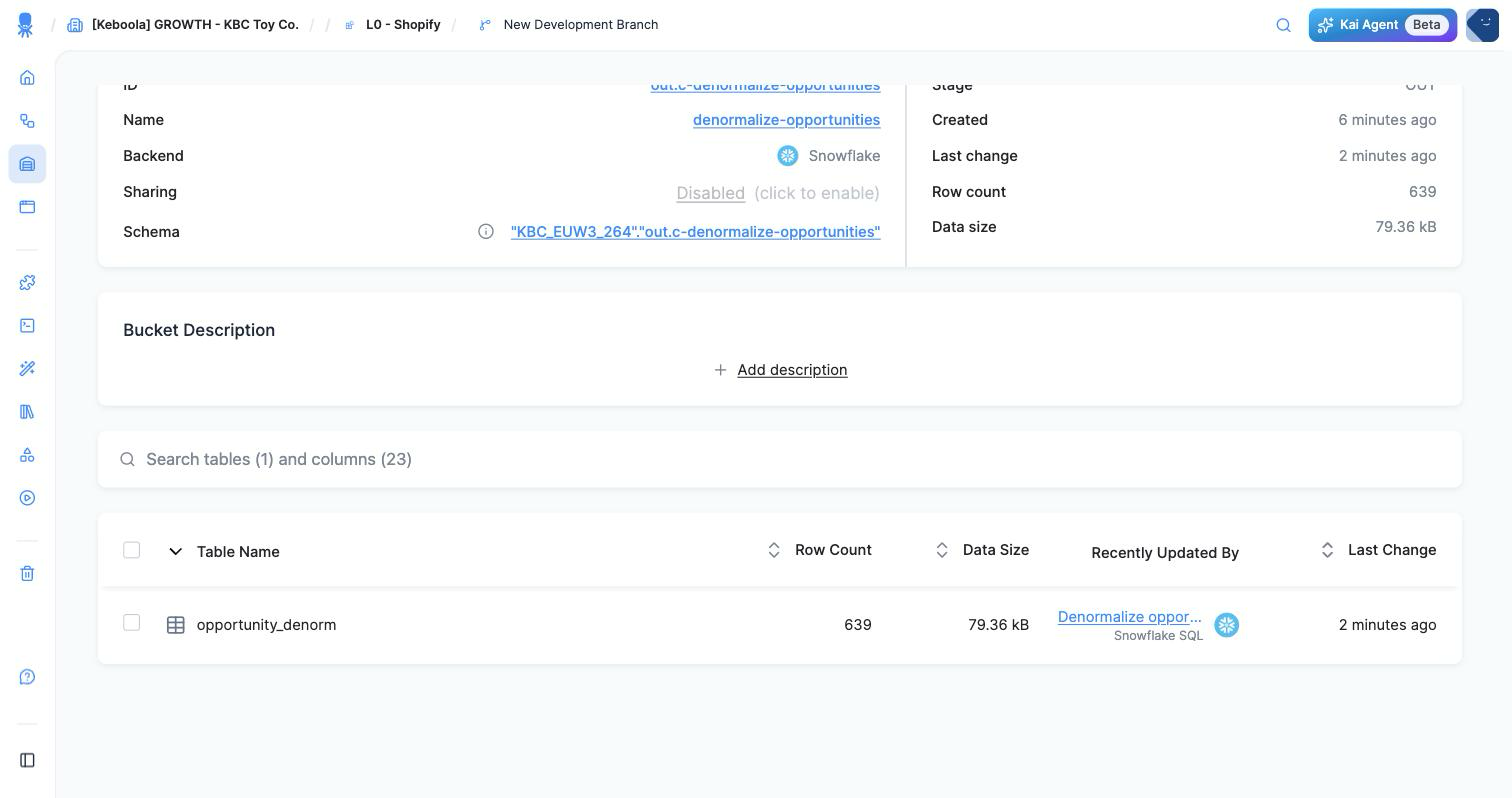
Then open Storage: there is a new bucket out.c-denormalize-opportunities — listed as
denormalize-opportunities with an OUT badge, the same way the in.c- prefix was hidden in
step 2 — holding
opportunity_denorm — 639 rows and 23 columns. That row count is the same as the source
opportunity table, which is the quickest sanity check that the three joins matched every row
without duplicating any.
The 23 columns are the original 15 plus the eight the SQL added: ProbabilityClass, UserName,
UserSalesMarket, UserGlobalMarket, AccountName, AccountRegion, AccountStatus and
AccountFirstOrder.
The table list also has a Recently Updated By column, naming the transformation and its
backend (Denormalize opportunities / Snowflake SQL here) — the fastest way to answer “where did
this table come from?” months later.
Running the transformation again simply rebuilds the table; it is safe to re-run while you are experimenting.
If it goes wrong
Section titled “If it goes wrong”Object 'ACCOUNT' does not exist(Snowflake). A table is missing from the input mapping, or the Table name inside the transformation differs from what the SQL uses. Snowflake uppercases unquoted identifiers, which is why every identifier is double-quoted. On BigQuery the equivalent error isTable ... was not found.- The job succeeds but Storage has no new table. The output mapping is empty or names a
table your SQL never creates. The names must match exactly:
opportunity_denorm. Numeric value '' is not recognized. Tables loaded from CSV arrive as text columns unless you give them types, so an empty cell is''rather thanNULLand a comparison like"Probability" < 50fails on it. The sample data has no empty values, so you will not hit this here — but with your own data, cast defensively:TRY_CAST("Probability" AS NUMBER(38,9))on Snowflake,SAFE_CAST(Probability AS INT64)on BigQuery.SELECT * EXCEPT: column _timestamp not found(BigQuery). The query strips a system column your input tables do not have — deleteEXCEPT (_timestamp)and run again. If instead the output mapping rejects an unexpected_timestampcolumn, put it back. Which of the two you hit depends on how your project stages input tables; see mappings.- You want to see what the query actually returns before saving. That is what a workspace is for.
Going further
Section titled “Going further”- Use a Workspace — develop and test queries against a copy of the data before committing them to a transformation. This is how the work is really done.